
Intro
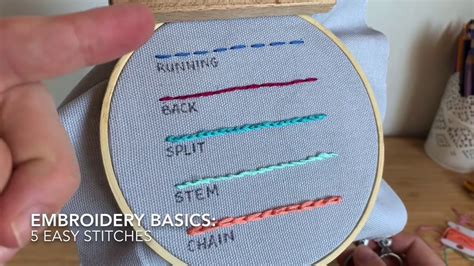
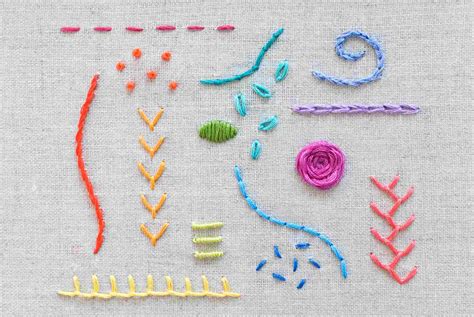
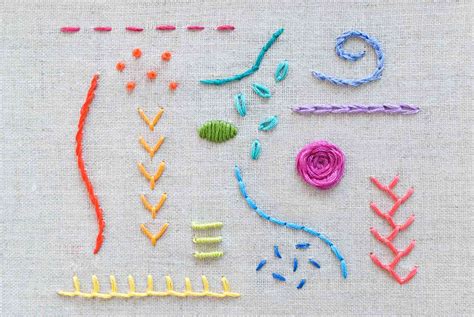
Master embroidery basics with 5 essential stitches, including running stitch, backstitch, and satin stitch, to create beautiful embroidery designs and patterns with ease.
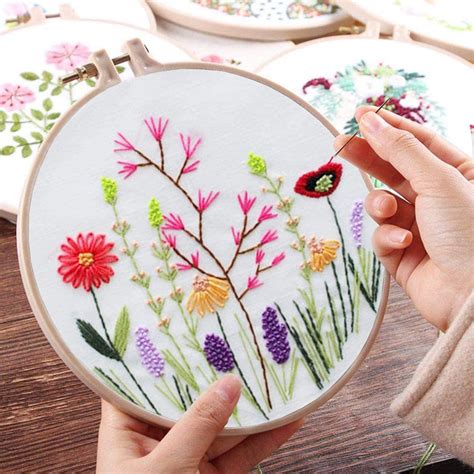
Embroidery is an ancient and beautiful art form that involves creating intricate designs on fabric using thread and needle. It has been a popular hobby and profession for centuries, with various cultures developing their unique embroidery styles and techniques. One of the essential skills required to master embroidery is learning the basic stitches. In this article, we will explore the 5 basic embroidery stitches that every beginner should know.
These stitches are the foundation of embroidery and can be used to create a wide range of designs, from simple to complex. Whether you are a beginner or an experienced embroiderer, mastering these basic stitches is crucial to improve your skills and create beautiful embroidery pieces. With practice and patience, you can learn these stitches and start creating your own unique embroidery designs.
Embroidery is not only a creative outlet but also a great way to relax and unwind. The repetitive motion of stitching can be meditative, and the sense of accomplishment you get from completing a project is incredibly fulfilling. Moreover, embroidery allows you to express your creativity and bring your ideas to life. With the right stitches and techniques, you can create stunning embroidery pieces that reflect your personality and style.
Introduction to Basic Embroidery Stitches
Understanding the Importance of Basic Stitches
Before we dive into the individual stitches, it's essential to understand the importance of mastering the basic stitches. These stitches are the foundation of embroidery, and without them, you cannot create complex designs. Moreover, practicing the basic stitches helps you develop the necessary skills, such as hand-eye coordination, fine motor control, and patience, which are essential for embroidery.The Running Stitch

To work the running stitch, start by threading your needle and tying a knot at the end of the thread. Bring the needle up through the fabric at the starting point of your design and insert it back into the fabric at a short distance away. Bring the needle back up at the same distance away, creating a small straight stitch. Continue working the running stitch along the line of your design, moving the needle in a consistent and rhythmic motion.
Tips for Working the Running Stitch
Here are some tips for working the running stitch: * Use a consistent stitch length to maintain even spacing. * Keep the tension of the thread even to avoid puckering the fabric. * Use a sharp needle to avoid splitting the fabric. * Practice working the running stitch in different directions to improve your control and coordination.The Backstitch
To work the backstitch, start by threading your needle and tying a knot at the end of the thread. Bring the needle up through the fabric at the starting point of your design and insert it back into the fabric at a short distance away, but in the opposite direction. Bring the needle back up at the same distance away, creating a small straight stitch. Continue working the backstitch along the line of your design, moving the needle in a consistent and rhythmic motion.
Tips for Working the Backstitch
Here are some tips for working the backstitch: * Use a consistent stitch length to maintain even spacing. * Keep the tension of the thread even to avoid puckering the fabric. * Use a sharp needle to avoid splitting the fabric. * Practice working the backstitch in different directions to improve your control and coordination.The Satin Stitch
To work the satin stitch, start by threading your needle and tying a knot at the end of the thread. Bring the needle up through the fabric at the starting point of your design and insert it back into the fabric at a short distance away, creating a small straight stitch. Bring the needle back up at the same distance away, creating another small straight stitch. Continue working the satin stitch in parallel rows, moving the needle in a consistent and rhythmic motion.
Tips for Working the Satin Stitch
Here are some tips for working the satin stitch: * Use a consistent stitch length to maintain even spacing. * Keep the tension of the thread even to avoid puckering the fabric. * Use a sharp needle to avoid splitting the fabric. * Practice working the satin stitch in different directions to improve your control and coordination.The Stem Stitch

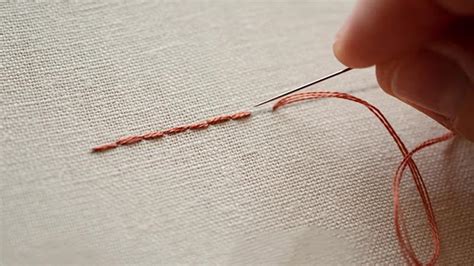
To work the stem stitch, start by threading your needle and tying a knot at the end of the thread. Bring the needle up through the fabric at the starting point of your design and insert it back into the fabric at a short distance away, creating a small diagonal stitch. Bring the needle back up at the same distance away, creating another small diagonal stitch. Continue working the stem stitch along the line of your design, moving the needle in a consistent and rhythmic motion.
Tips for Working the Stem Stitch
Here are some tips for working the stem stitch: * Use a consistent stitch length to maintain even spacing. * Keep the tension of the thread even to avoid puckering the fabric. * Use a sharp needle to avoid splitting the fabric. * Practice working the stem stitch in different directions to improve your control and coordination.The French Knot
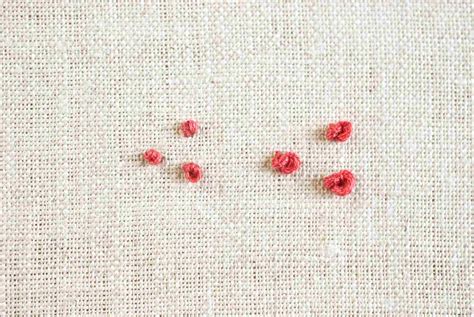
To work the French knot, start by threading your needle and tying a knot at the end of the thread. Bring the needle up through the fabric at the starting point of your design and wrap the thread around the needle, creating a small loop. Insert the needle back into the fabric, creating a small knot. Continue working the French knot along the line of your design, moving the needle in a consistent and rhythmic motion.
Tips for Working the French Knot
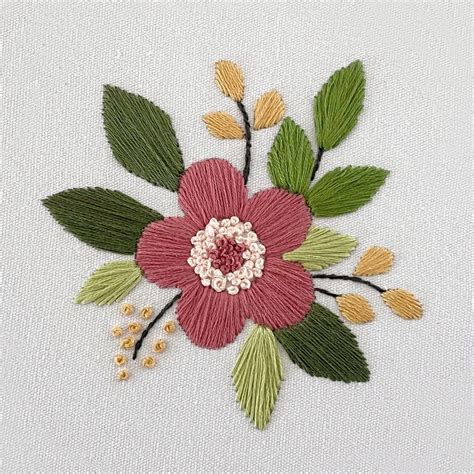
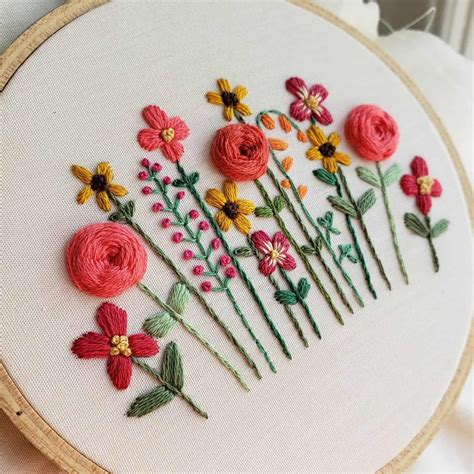
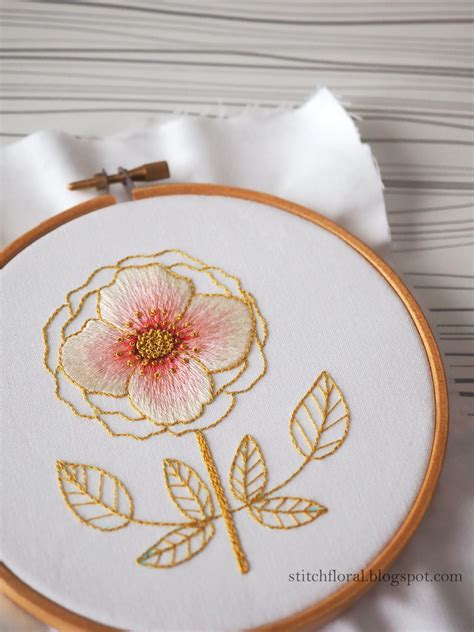
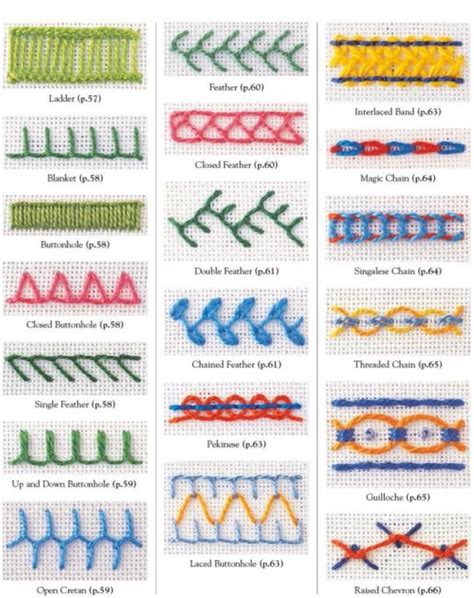
Here are some tips for working the French knot: * Use a consistent thread tension to maintain even knot size. * Keep the needle sharp to avoid splitting the fabric. * Practice working the French knot in different directions to improve your control and coordination.Embroidery Stitches Image Gallery

What are the basic embroidery stitches?
+The 5 basic embroidery stitches are the running stitch, backstitch, satin stitch, stem stitch, and French knot.
How do I work the running stitch?
+To work the running stitch, bring the needle up through the fabric and insert it back into the fabric at a short distance away, creating a small straight stitch. Continue working the running stitch along the line of your design, moving the needle in a consistent and rhythmic motion.
What is the difference between the backstitch and the stem stitch?
+The backstitch is worked in a straight line, while the stem stitch is worked in a diagonal line. The backstitch is often used to create bold lines and shapes, while the stem stitch is used to create stems, leaves, and other organic shapes.
How do I work the French knot?
+To work the French knot, wrap the thread around the needle and insert it into the fabric, creating a small knot. Continue working the French knot along the line of your design, moving the needle in a consistent and rhythmic motion.
What are some tips for working embroidery stitches?
+Some tips for working embroidery stitches include using a consistent stitch length, keeping the tension of the thread even, and practicing the stitches in different directions to improve control and coordination.
In