5 Northern Lights Pictures

Intro

Witness breathtaking 5 Northern Lights Pictures, showcasing aurora borealis photography, polar lights, and natural wonders, with stunning displays of solar activity and celestial beauty.

The Northern Lights, also known as the Aurora Borealis, are a breathtaking natural phenomenon that has captivated people for centuries. The dancing lights in the night sky are a sight to behold, and many people travel to remote locations to witness this spectacle. In this article, we will delve into the world of Northern Lights pictures, exploring what makes them so special and how you can capture your own stunning images.

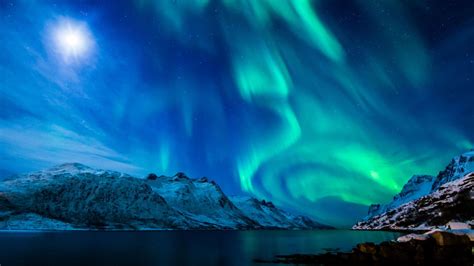
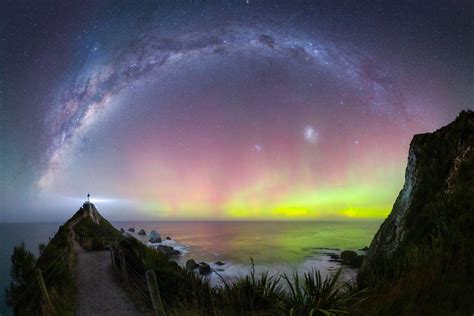
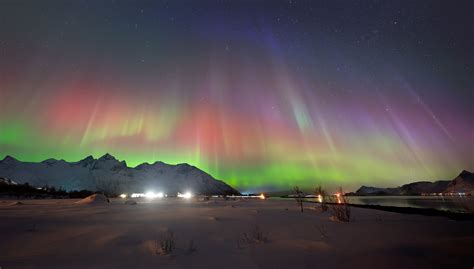
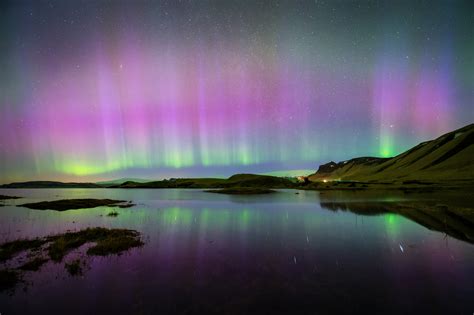
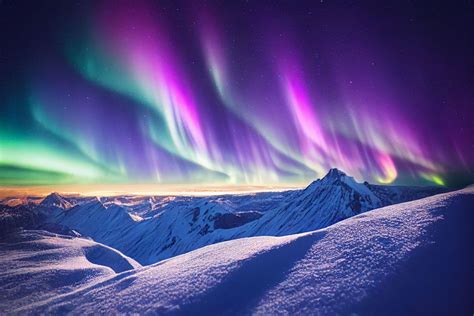
The Northern Lights are a display of colored lights that appear in the night sky, typically at high latitudes. The colors can range from soft pinks and greens to vibrant purples and blues. The lights are caused by charged particles from the sun interacting with the Earth's magnetic field and atmosphere. This natural light show is a popular subject for photography, and many photographers travel to locations such as Alaska, Canada, and Norway to capture the perfect shot.

Understanding the Northern Lights

Northern Lights dancing in the sky
To take great Northern Lights pictures, it's essential to understand the science behind this phenomenon. The Northern Lights are most active around the equinoxes in March and September, and they can be seen in the Northern Hemisphere. The best time to see the Northern Lights is typically between 10 pm and 2 am, when the sky is darkest. The lights can be affected by cloud cover, moon phase, and solar activity, so it's crucial to check the forecast before heading out to take photos.

Equipment for Northern Lights Photography

Camera equipment for Northern Lights photography
To capture stunning Northern Lights pictures, you'll need the right equipment. A DSLR or mirrorless camera with manual controls is essential, as it allows you to adjust the exposure and focus to suit the conditions. A wide-angle lens with a focal length of 10-24mm is ideal for capturing the broad sweep of the Northern Lights. A tripod is also necessary to stabilize the camera and prevent camera shake. Additionally, a remote shutter release or camera timer can help minimize camera movement and ensure sharp images.

Techniques for Capturing Northern Lights Pictures

Camera settings for Northern Lights photography
To take great Northern Lights pictures, you'll need to use the right techniques. First, set your camera to manual mode and adjust the exposure to suit the conditions. A good starting point is an exposure of 10-20 seconds at an ISO of 800-1600. You may need to adjust the exposure compensation to avoid overexposing the image. Focus is also critical, as the Northern Lights can be sharp or blurry depending on the conditions. Use the live view mode to focus on the lights, and then switch to manual focus to lock the focus in place.

Composition and Creativity

Creative composition for Northern Lights photography
When it comes to composition, the Northern Lights offer a unique challenge. The lights can be dynamic and unpredictable, so it's essential to be creative and flexible. Look for interesting foreground elements, such as trees, rocks, or buildings, to add depth and context to the image. Consider using a low-angle shot to emphasize the scale and drama of the Northern Lights. You can also experiment with different angles and perspectives, such as shooting from a low or high vantage point.

Post-Processing and Editing

Post-processing techniques for Northern Lights photography
After capturing your Northern Lights pictures, it's time to edit and enhance them. Use image editing software such as Adobe Lightroom or Photoshop to adjust the exposure, contrast, and color balance. You can also use noise reduction tools to minimize digital noise and sharpening tools to enhance the details. Be careful not to over-process the image, as this can lead to an unnatural or artificial look.

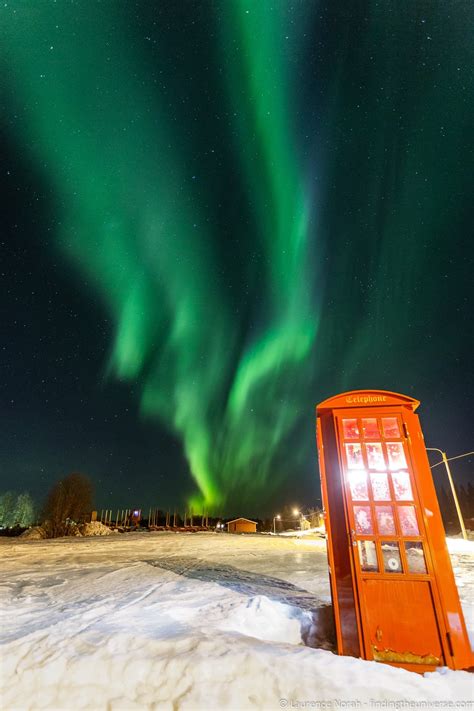
Gallery of Northern Lights Images

What is the best time to see the Northern Lights?

+

The best time to see the Northern Lights is typically between 10 pm and 2 am, when the sky is darkest.

What equipment do I need to capture Northern Lights pictures?

+

You'll need a DSLR or mirrorless camera with manual controls, a wide-angle lens, and a tripod to capture stunning Northern Lights pictures.

How can I edit and enhance my Northern Lights pictures?

+

You can use image editing software such as Adobe Lightroom or Photoshop to adjust the exposure, contrast, and color balance, and to minimize digital noise and enhance the details.

As we've explored the world of Northern Lights pictures, we've seen the beauty and wonder of this natural phenomenon. Whether you're a seasoned photographer or just starting out, capturing the Northern Lights can be a thrilling experience. By understanding the science behind the Northern Lights, using the right equipment and techniques, and editing and enhancing your images, you can create stunning Northern Lights pictures that will leave a lasting impression. So why not grab your camera and head out to capture the magic of the Northern Lights? Share your own Northern Lights pictures and stories with us, and let's continue to explore the beauty of this incredible phenomenon together!

Jonny Richards

Starting my journey 3 yrs ago. At nnu edu, you can save as a template and then reuse that template wherever you want.